
(Please click the image to see the full-size tag. Thanks!)
This tutorial was written on Wednesday, April 4th 2012 by Mystery Designs. It was written in PSP X2 and assumes a good, working knowledge of the program. Any similarity to other tutorials is purely coincidental and not done intentionally. Please do not copy or claim the tutorial as your own. If you wish to do so, please link to my blog should groups or forums use it in challenges, and please leave me a comment with a link to where it is being used. Thanks :)
**Supplies Needed**
Tube of choice. I'm using a free tube by OrkusArt. They are with Pics For Designs and you can find them here
Scrapkit of choice. I'm using a pretty Easter kit called “Easter Feelings” by Jen of Sleek N Sassy Designz which you can purchase here
Font of choice
**Plugins**
Xero - Porcelain
Ready? Lets begin.....
Open a new image – Canvas Size – 700 x 700 pixels
If you like smaller tags, this can be resized later on. It is just to give room to work :)
Open up your tube of choice
press shift + d to duplicate
Close the original
Open up “EF_Frame4” from the kit
Copy – Paste – as new layer and rename “Frame”
Grab you Magic Wand tool with these settings :

Select inside all four squares of the frame
Selections – Modify – Expand – 4 pixels
Open up “EF_Paper5” from the kit
Copy – Paste – as new layer and rename “Framebg”
Selections – Invert and hit delete
Highlight your “Raster 1” layer
Selections – All
Highlight your “Framebg” layer
Image – Crop to Selection
(This should remove any excess paper which might be a problem later on when resizing)
Open up “EF_Element15” from the kit
Copy – Paste – as new layer and rename “Chick1”
Image – Mirror
Highlight your “Framebg” layer
Selections – Select All – Float – Defloat
Selections – Invert
Highlight your “Chick1” layer and hit delete
Selections – None
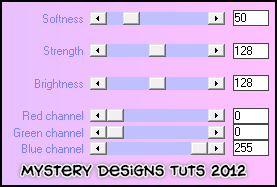
Effects – Plugins -Xero – Porcelain with the default settings :
Change the Blend Mode to “Luminance (Legacy)”
Highlight your “Frame” layer
Add a drop shadow
Open up “EF_Element69” from the kit
Copy – Paste – as new layer and rename “Happy Easter”
Image – Resize – 64%
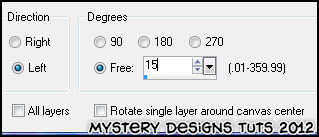
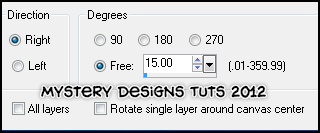
Image – Rotate – Free Rotate with these settings :
Arrange along the top of the frame
Add a drop shadow
Open up “EF_Element46” from the kit
Copy – Paste – as new layer and rename “Bow1”
Image – Resize – 25%
Arrange at the top-left of the Happy Easter string
Layers – Duplicate and rename “Bow2”
Image – Mirror
Arrange at the top-right of the Happy Easter string
Add a drop shadow to both bows
Open up “EF_Element40” from the kit
Copy – Paste – as new layer and rename “House”
Arrange the house down at the bottom left of your frame
Add a drop shadow
Open up “EF_Element13” from the kit
Copy – Paste – as new layer and rename “Pot”
Image – Resize – 45%
Arrange it down in front of the egg house at the bottom left of your frame
Add a drop shadow
Open up “EF_Element38” from the kit
Copy – Paste – as new layer and rename “Cupcake”
Image – Resize – 25%
Arrange the cake so it is next to the pot we have just placed
Add a drop shadow
Open up “EF_Element10” from the kit
Copy – Paste – as new layer and rename “Bunny1”
Image – Resize – 35%
Arrange so your bunny is sat near the pot at the bottom left of your frame
Add a drop shadow
Open up “EF_Element57” from the kit
Copy – Paste – as new layer and rename “Eggpop”
Image – Resize – 45%
Arrange the Egg pop so it is down at the bottom left of your frame near the cupcake
Layers – Arrange – Move Down
Layers – Arrange – Move Down
Add a drop shadow
Open up “EF_Element67” from the kit
Copy – Paste – as new layer and rename “Bunnypop”
Image – Resize – 40%
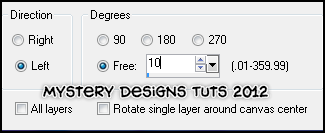
Image – Rotate – Free Rotate with these settings :
Arrange the Bunny pop down at the bottom left of your frame near the other pop
Add a drop shadow
Open up “EF_Element60” from the kit
Copy – Paste – as new layer and rename “Flowers1”
Arrange them so they are at the bottom right of your frame, slightly overlapping at the bottom
Layers – Duplicate and rename “Flowers2”
Image – Mirror
Arrange the duplicate so that it overlaps the top left edge of the frame
Layers – Merge – Merge Down
Drag this layer down in your layer palette so that it rests above your “Raster 1” layer
Add a drop shadow
Highlight your “Bow2” layer
Open up “EF_Element22” from the kit
Copy – Paste – as new layer and rename “Flowers3”
Arrange it at the bottom of your tag next to the egg house
Drag this layer down in your layer palette so it rests above your “Flowers1” layer
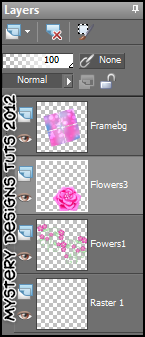
Your layer palette should now look something like this :
Highlight your “Bow2” layer
Open up “EF_Element72” from the kit
Copy – Paste – as new layer and rename “Butterfly1”
Image – Resize – 20%
Image – Rotate – Free Rotate with these settings :
Arrange the butterfly so that it rests on one of the flowers on the right-hand side of your tag
Layers – Duplicate and rename “Butterfly2”
Image – Mirror
Arrange the second butterfly so that it rests on one of the flowers on the left-hand side of your tag
Layers – Merge – Merge Down
Add a drop shadow
Copy and paste your tube as a new layer and rename “Tube”
Arrange it over to the right-hand side of your tag
Add a drop shadow
Open up “EF_Element19” from the kit
Copy – Paste – as new layer and rename “Bunny2”
Image – Resize – 20%
Arrange along the bottom of your tag. Placement will depend on the tube you have chosen for the tag :)
Add a drop shadow
Open up “EF_Element9” from the kit
Copy – Paste – as new layer and rename “Chick2”
Image – Resize – 25%
Arrange along the bottom of your tag. Again, this will depend on choice of tube.
Add a drop shadow
Open up “EF_Element36” from the kit
Copy – Paste – as new layer and rename “Chick3”
Image – Resize – 25%
Arrange along the bottom of your tag
Add a drop shadow
**If you wish to resize your tag, now is the time to do so**
Add your name and all copyrights.
Save your finished tag and you’re done!

No comments:
Post a Comment